All Leathercraft Library patterns and projects are property of Tandy Leather. Projects and patterns available are a part of the Tandy Leather Archive and may contain outdated product information or service offerings. Projects and patterns can be reproduced for personal use by printing, but Tandy Leather cannot guarantee the quality of reproduction or printing due to the image quality available. Some project and pattern themes or motifs may not be representative of Tandy Leather’s current views.

Gift Idea: TandyPro® Biker Wallet Template with Carving Pattern

Gift Idea: TandyPro® Biker Wallet Template with Carving Pattern
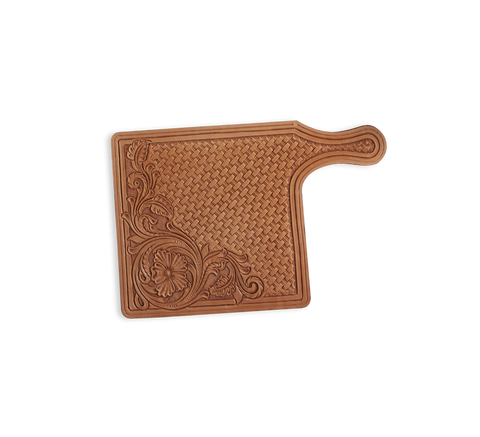
Pair our TandyPro Biker Wallet Template with a custom carving pattern designed by Collin Williams, Tandy Leather Store Trainer. Follow his step-by-step tutorial and download the free pattern to get started!

Materials:
- TandyPro Biker Wallet Template (SKU 3600-04)
- 2 sq. ft. Veg-Tan Leather 5 to 6 oz.
- 2 sq. ft. Veg-Tan Leather 2 to 3 oz.
- Line 24 Snaps (SKU 1263-)
- Zipper 7" (SKU 58001-01)
- Tanner's Bond Permanent Adhesive Tape (SKU 2535-03)
- Tyvek Sheet (SKU 4089-02)
- Waxed Nylon Thread (SKU 1227-)
- Stitching Needles (SKU 1195-00)
Tools:
- Craftool® Diamond Stitching Chisels 2 or 4 Prongs (SKU 88043-00)
- Craftool® Round Drive Punches #2 1/8" (SKU 3777-02)
- TandyPro® Tools Edge Bevelers #2 (SKU 86001-03)
- Personna Folding Utility knife (SKU 3594-00)
- Sandpaper
- Craftool® Edge Burnishing Machine (SKU 3972-20)
- Craftool® Line 24 Snap Setters (SKU 8058-00)
- Straight Edge
Liquids:
- Tanner's Bond Contact Cement (SKU 2525-01)
- Eco-Flo Gum Tragacanth Burnishing Agent (SKU 2620-01)
- Eco-Flo Edgeflex Edge Paint (SKU 2810-) optional
- Fiebing's Leather Dye (SKU 2100-) optional
- Dr. Jackson's Pure Neatsfoot Oil (SKU 21997-00) optional
- Eco-Flo Top Finish Gloss (SKU 2801-01) optional
Instructions:
1. Cut face panel from 5/6 oz veg tanned leather

2. Cut interior parts from 2/3 oz veg-tanned leather. You will need to add ¼” to the sides of the interior parts if you are going to tool the face of the wallet

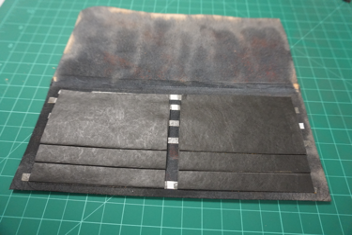
3. Mark and punch holes at end of card slots

4. Using a straight edge, cut a slit in-between hole in card slots as marked on template

5. Mark and slot for zipper on coin pouch

6. Use a 1/2” drive punch to punch out the ends of the zipper slot

7. Using a straight edge, cut in-between holes punched for zipper slot

8. Use the integral credit card spacer to mark all stops for credit card pockets

9. Complete all tooling, coloring and clear coating desired

10. Mark or punch all stitching on face panel

11. Sew credit card holder onto cash flap

12. Apply double sided tape alongside of zipper slot on interior of panel

13. Install zipper from the interior of panel

14. Sew in zipper and trim off any excess zipper

15. Apply contact cement to all edges of the panel about ½” in from the edge

16. Fold panel in half adhering all edges together

17. (optional step) use either a v or a u-gouge to make a gouge in the middle of the panel above the card slots

18. Build interior (refer to Makers Leather Supply interiors for instructions)

19. Apply contact cement around the edge of the panel about ½” from the edge along with a thin line in-between card slot and along fold

20. Fold panel and adhere all edges

21. (Optional step) Glue in lining pieces

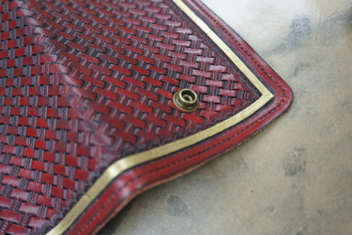
22. Install line 24 snap

23. Cement card pocket onto face panel and stitch together (refer to hand stitching leather for more detailed instruction)

24. Cement cash flap to coin pouch

25. Mark where closure meets coin pouch

26. Finish edge from corner to mark

27. Stitch from corner to mark

28. Cement coin pouch onto face panel and stitch together

29. Finish all edges (refer to finishing veg-tanned edges for more instructions)

30. Enjoy your finished product!


Comments
Leave a comment