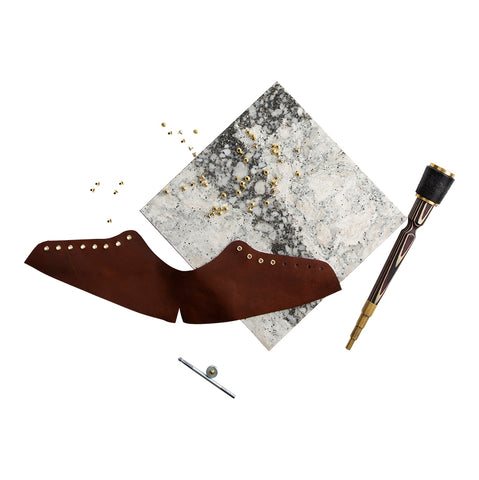
Our Sneaker Starter Pack will get you started making a pair of leather sneakers in one of three styles, low-top, mid-top, or high-top! This intermediate-level project includes a pair of insoles and outsoles, pattern, and project instructions.
An ideal project for leftover or scrap leather, we recommend using leather ranging from 3-4 oz. (1.2-1.6 mm) up to 7-8 oz. (2.8-3.2 mm). If using lighter-weight leather we advise you to add a 1-2 oz. (0.4-0.8 mm) lining.
Shop Sneaker Starter Pack
Sneaker Starter Pack Includes:
- Pattern & Instructions
- Outsoles (2)
- Insoles (2)
To complete the project, you will also need:
Other supplies needed:
Instructions:
1. Cut out each pattern piece for your desired shoe style (Left Tongue, Right Tongue, Left Shoe, Right Shoe).

OPTIONAL:
Glue or tape your pattern pieces to card stock
or poster board for additional stability or if you want to reuse the patterns in the future.
2. Place pattern, printed side up, on your leather and use a leather marking pen or scratch awl to trace the outline of each pattern piece and mark your eyelet holes and stitching lines. Once marked, remove pattern pieces and cut out your leather.
3. If you are lining your shoes, be sure to reuse your patterns to cut out your liner pieces then stitch the liner and leather together, grain side out then trim and finish your edges.
4. Punch all the holes for your eyelets to lace your shoes with your round drive punch.

5. Place eyelets into the holes and set using your eyelet setter.
6. Following the instructions on your Sewing Awl Kit, set up your awl to stitch. Place your left shoe leather piece into the left outsole and line up center marking on the heel with the center marking on the outsole.

7. Starting at the front toe (A), push your awl through both the outsole and your leather piece and pull about a foot of thread through the hole.

8. Thread an extra needle on the inside thread of your stitching awl. This makes it easier to pull the back thread through the loop made when pulling the awl back.

9. Sew from the front (A) towards the center of the heel (B) and finish by backstitching at least 3 stitches. Trim thread.
10. Once you have finished the main stitch line, sew the support stitch line starting at the front (C) and stitch back to point (D). Backstitch at least 3 stitches at the end to lock your stitches and trim your thread.

11. Once you have sewn one side onto the outsole repeat steps 6-10 to sew the other side of the shoe. Towards the end of the stitch the leather will get tight, this is normal.
12. Sew the toe into your shoe. Center the left toe leather piece into the toe area of the outsole. Begin your stitch in the center of the toe (F) and stitch to one side, ending at point (G). Backstitch at least 3 stitches at the end to lock your stitches and trim your thread.

13. Go back to the center of the toe (F) and stitch the line on the opposite side, backstitching at the end (G) to lock your stitches.

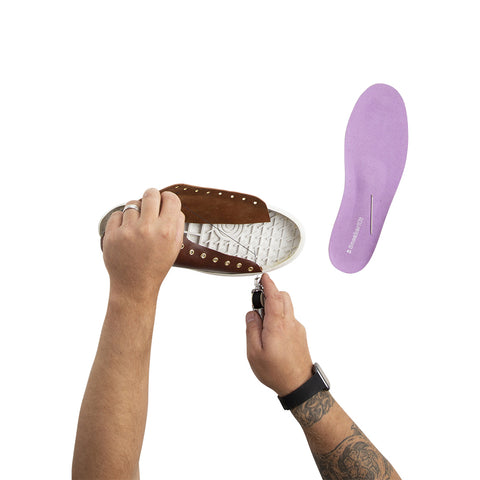
14. Insert the included insole and lace up the shoe.
15. Follow steps 6-14 using your opposite toe and right shoe pieces to complete the other shoe.


Leave a comment