All Leathercraft Library patterns and projects are property of Tandy Leather. Projects and patterns available are a part of the Tandy Leather Archive and may contain outdated product information or service offerings. Projects and patterns can be reproduced for personal use by printing, but Tandy Leather cannot guarantee the quality of reproduction or printing due to the image quality available. Some project and pattern themes or motifs may not be representative of Tandy Leather’s current views.

Gift Idea: Inverted Zipper Wallet with Heaps Good Leather Work

Gift Idea: Inverted Zipper Wallet with Heaps Good Leather Work
Benny, founder of Heaps Good Leather Work, made and designed this inverted zipper wallet. Follow his step-by-step tutorial and download the FREE pattern to get started!
This is a template for a unisex medium carry wallet for both cards and cash. A 1-2 mm thickness vegetable-tanned leather is best suited for this type of project. Tandy Old World Veg-Tan Belly is used for this instructional guide. This is an intermediate level wallet design and some basic understanding of wallet construction is highly recommended before attempting this design.
The pockets have a straight edge for ease of construction for this instructional guide, but it is encouraged to play around with pocket designs to add your unique flair. The pocket templates are easily modified to suit your designs and patterns.
Happy crafting!
Benny – Heaps Good Leather Work
Products
Here is an image of the tools used in this project. The only additional materials required are large-size or any suitable leather needles, adhesive (here we are using Tanner's Bond® Contact Cement and double-sided tape), any suitable 0.8 mm waxed nylon thread, and a hammer, maul, or mallet.

Instructions
1. Print and cut out template pieces onto heavy card stock, or glue the template onto heavy card stock. This ensures the edges will degrade less rapidly and all your pieces are consistent in shape.

2. Using a scratch awl, trace around your patterns on your leather

3. Using a scalpel or any quality utility knife, carefully cut out your patterns.
IMPORTANT: DO NOT cut out the oblong section in the piece from template No. 1. This will be removed later to ensure nice clean edges
Note: Ensure your blade is sharps to get nice clean cuts. Your number one knife rule for all replaceable blade utility knives should always be, "New project, new blade."

4. Gluing and stitching the pockets.
Skiving and burnishing should be done at this point as it will not be possible after the next steps. Burnishing the pocket edges is not necessary, however, it does give the finished product a much more professional look. (consult step 7.5-7.7 for burnishing instructions).
Skiving the bottom section of the T-shaped pieces is also not required, however, if using thick leather this will reduce bulk in the finished product and help the cards to sit easier and neater.
Note: If inexperienced with skiving, practice is recommended. Ensure you have extra leather at hand because over skiving is common and even experienced skivers make mistakes. Take your time and don’t rush.

5. Mark where the pockets will be on the leather piece from template No. 1. Put adhesive on the pocket tabs of only 2 opposing pockets and on the space where these tabs glue onto the larger piece.

6. When adhesive is ready, place the pockets onto their marked spaces and lightly hammer the parts with adhesive to ensure a secure bond.
Note: A) Use a scratch awl or a leather roughing tool on the areas where adhesive will be used to help create a stronger bond. B) The tabs on the T-shaped pockets should be longer than necessary. Leaving this excess will allow them to be cut off later for clean edges.

7. Use pricking irons to punch holes for stitching along the bottom of each pocket. This can also be done with a sewing machine if using one to sew this wallet.

8. Saddle stitch along the bottom of the pocket.

9. If safe to do so, when finished stitching use a lighter to burn the ends of the threads to form a plug to avoid pull through, and gently hammer over the stitch line. This helps to set the stitch and close the holes in the leather. This is important as a flat stitch line will help the cards to slide in and out of the wallet freely.

10. Repeat steps for installing the pockets with the two remaining pockets.


11. Pocket Stamping: If you want to stamp or emboss anything onto the front pockets of the wallet do so now as it will be difficult to do so after this step.

12. Glue Front Pockets: Use your roughing tool to dress the leather where you will glue the front pocket to the wallet then apply adhesive.

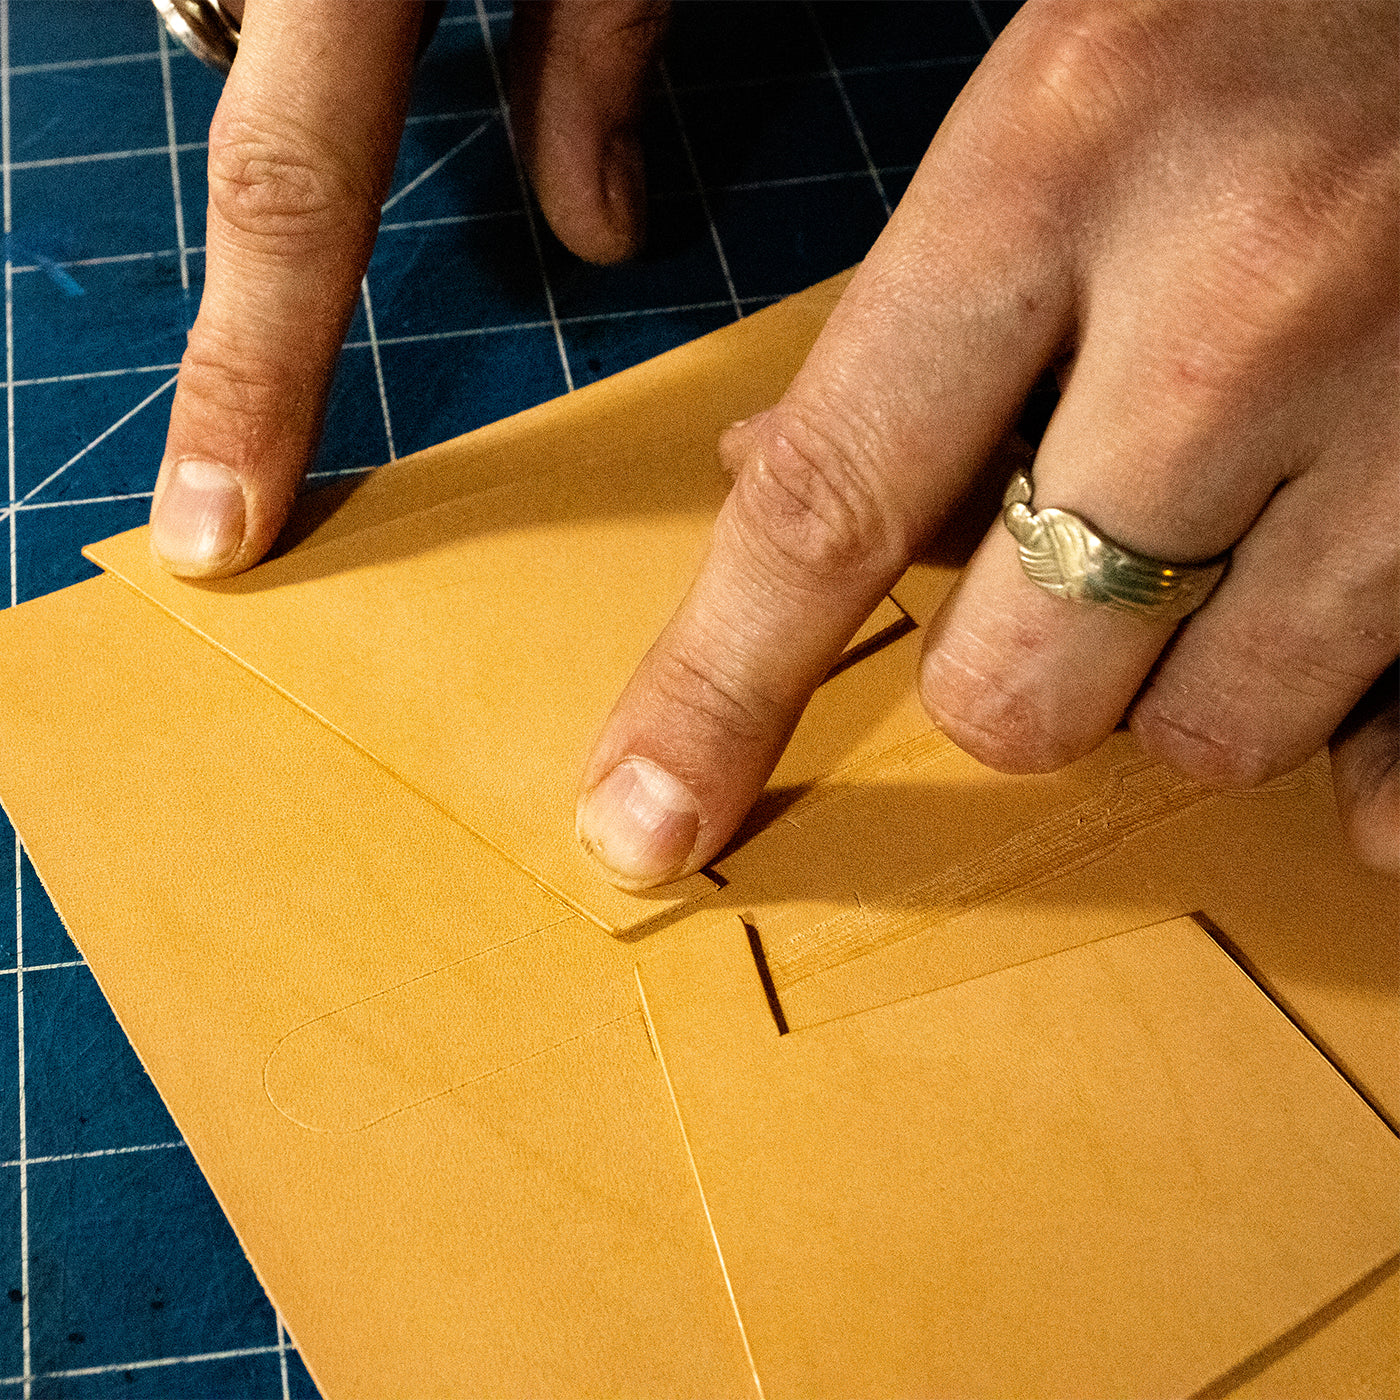
13. Align the front pocket with the lower edge of the T-shaped pockets and glue together using the hammer to form a good bond.
Note: The wallet design is 1-2 mm larger than the finished size. This will allow us to remove a small amount from the edges later down the track to ensure nice clean edges so don’t worry if the edges don’t meet perfectly at this step. Just make sure the pocket edges are flush.

14. Prepare Zipper Slot: Using Template No. 1, mark the oblong shape in the center over the pockets.

15. Cut out the oblong shape from the middle of your wallet. A 15 mm round hole punch makes cutting the curves very easy, however, if you do not have one it can be done carefully with your utility knife.


16. Using fine-grit sandpaper, lightly sand the edges of the interior space to remove excess fibers.

17. Using a No. 0 or No. 1 edge beveler, carefully bevel the edges.

18. Apply a burnishing compound and burnish using a burnishing stick or canvas cloth. Here we are using Eco-Flo® Gum Tragacanth. Work the stick or canvas along the edge in one direction for a few passes until the fibers are laying down, then vigorously rub the edge until you achieve a nice slick edge. If you have not achieved the desired result, rework the edge with sandpaper and re-burnish until happy.
Note: Burnishing is not essential, however, it will give the wallet a more finished and professional look. If you do not have access to gum tragacanth or a similar compound, water, bees, or paraffin wax will also work.

19. Installing the zipper: Lay the wallet over the zipper to ensure you have enough zipper length and decide which end of the wallet you want to zip from. Then turn it over and mark where the zipper needs to be trimmed. Mark a few millimeters in from the edge of the wallet to make sure the zipper does not hang over the edge and carefully cut off the excess and using a lighter carefully singe the cut edges to prevent fraying.
Note: There is no need to install a zip stopper as the end of the zipper slot acts as a stopper.


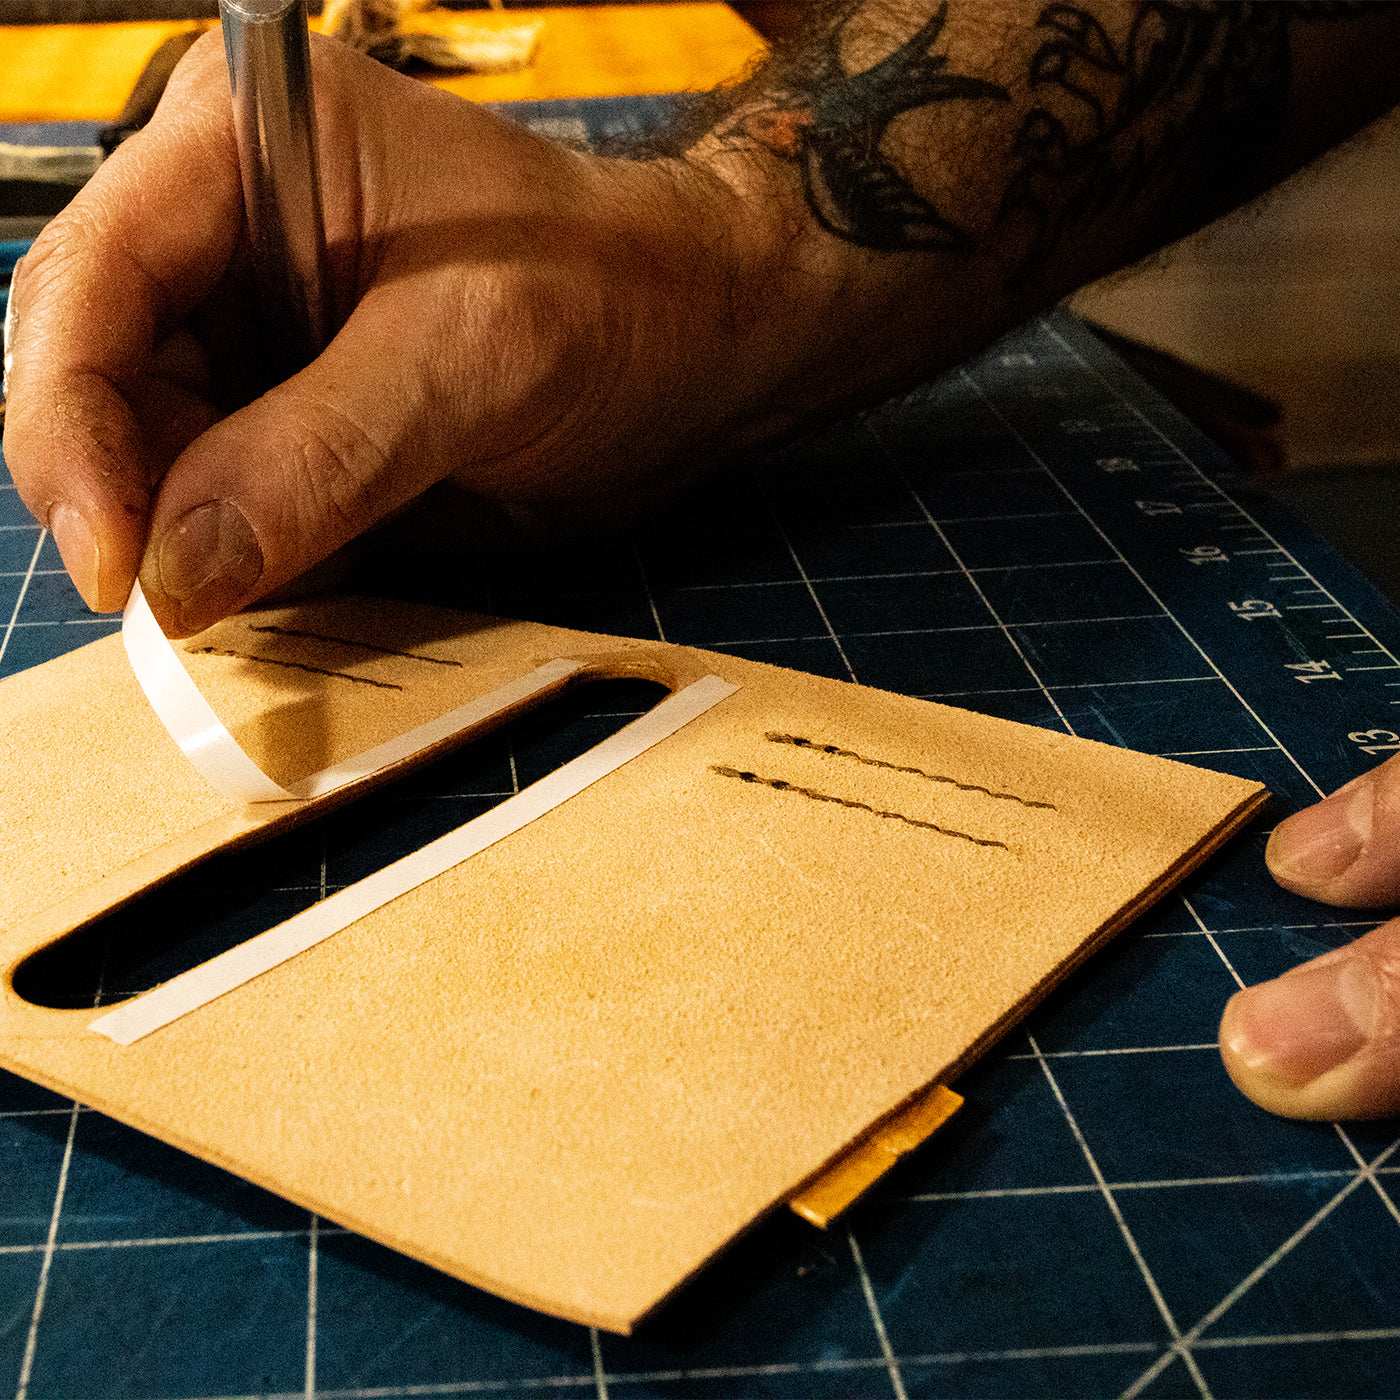
20. Using double-sided tape or your adhesive, glue the zipper into place.
Note: Double-sided tape is recommended here instead of contact adhesive as the zipper material is likely to absorb the glue and discolor the zipper.


21. Use your wing dividers to mark your line for punching your holes around the zipper slot and punch holes with pricking iron.


22. Stitch around your zipper slot.


22. It is recommended to double stitch both ends of the zipper as these are the areas that will receive the most stress from opening and closing. I also double stitch the tops of the pockets as these are high-stress areas from inserting and removing cards frequently. This is not essential but it will provide some extra strength.
Note. The single-layer piece of leather at the top of the zipper may be quite thin depending on the thickness of your leather. It is recommended to not stitch with too much tension as you may tear through the holes and the project will be ruined.

23. Apply Adhesive to the Two Halves: After your zipper is installed, apply adhesive to the inner surface of the wallet, avoiding the parts where the zipper is as these parts will not meet.

24. While your adhesive is drying carefully remove the tabs from your card pockets.

25. Glue the Two Halves Together: It is now time to stick the two halves of your wallet together. Again, do not worry if the corners do not meet perfectly as we will trim the wallet in the next step.
The most important factor in this step is to ensure that the card slot edges align perfectly as it will make the stitching for easier and neater if the holes align on either side.

26. Once your pockets are aligned you can then do your best to make sure the other edges meet as close as possible and apply pressure to ensure a proper bond between the two halves.

27. As previously mentioned, the pattern is a couple of millimeters larger than necessary as it allows for us to neaten our edges after gluing. If there is very little variation between your edges you can tidy them up with a rotary sanding tool or sandpaper, however, if confident doing so you can use your ruler and utility knife to trim down the edges to get a nice clean edge.
Note: Ensure your knife is nice and sharp as a dull blade may create difficulty in getting a clean cut and this may ruin your project. It is recommended to make several shallow, controlled cuts instead of one single cut. Substituting power for control here will help you get a cleaner cut.


28. Once happy with your edges, it’s time to trim the corners. The pattern corners have been left square for makers to choose how they want to do the corners. Keep them square for a more angular look or use any means necessary to achieve the desired corner look.
Note: I use various sizes of metal washers to do my corners as they provide a good, clean template and I can achieve nice clean corners by taking small slices off the corner leather instead of one circular cut.

29. Punch and Stitch Wallet: Using your wing dividers, scribe your stitch line and punch your holes. Refer to image 12.2 and 15.3 to see where is appropriate to end your stitch line.
Note: It is recommended to try to align your holes so that a hole passes through where the card pockets meet. This gives you a strong stitch for each pocket and extra strength in high-stress areas.

30. Stitch your wallet, and if doing so remember to double stitch the tops of the pockets for extra strength.

31. After stitching, be sure to use your hammer or mallet to set the stitch and close the holes.

32. Finish Edges: If you are not concerned with finishing your edges then your wallet is just about finished and you should proceed to step 14. However, if burnishing your edges, then follow the steps outlined in step 7 to prepare the edges for burnishing.


33. Break Excess Adhesive Bonds: Using a folder if you have one available to you, gently use it to work your way around the glued seams to break any excess adhesive that will prevent proper functioning of the wallet.

34. Condition the leather. If you have some, apply a light finish of leather conditioner to protect the leather.

35. Self Appreciation! Sit down and enjoy your craftsmanship and pat yourself on the back. Go on, you’ve earned it.

Thanks for building along, and good luck with all your future projects. Don’t forget to tag @heapsgoodleatherwork so I can see your creations. Cheers. - Benny
📸 Lachlan Phyland of @media_provided.
Heaps Good Leather Work
Instagram: https://www.instagram.com/heapsgoodleatherwork/
Website: https://www.heapsgoodleatherwork.com/


Comments
Leave a comment